Twitter, now called X, is filled with endless information. If you’re worried about the data you’re sharing or the time spent on the platform, now might be the perfect time to step back or even leave altogether. Learn how to deactivate and delete your Twitter account to take control of your digital presence and enhance your online privacy.
Reasons to Consider Deleting Your Twitter Account
Twitter has long been popular for sharing news, personal updates, and trending topics, making it a hub for entertainment, sports, and current events. However, the platform comes with drawbacks like trolls and spambots that can impact your online safety. Also, since X posts are public and indexed by search engines like Google and Bing, privacy concerns may arise for many users. If these issues are making you reconsider your time on X, below you’ll find a straightforward guide with five steps to help you permanently delete your account.
Important Considerations Before Deactivating Your X Account
If you’re thinking about deactivating or deleting your X account, here are some key points to remember:
- Search Engine Listings: Deleting your X account won’t remove information from search engines like Google or Bing, as Twitter does not control external sites;
- Mentions of Your Username: When your profile is deactivated, mentions of your username in other posts will still appear, but they will no longer link back to your profile;
- Updating Username or Email: There’s no need to delete your profile to change your username or email address; these can be updated anytime in the Account Information section;
- Restoring Your Account: Logging into your account within 30 days of deactivation will restore it without issues;
- Data Backup: If you want a copy of your Twitter data, request it before deactivation. Deactivating does not remove your data from X’s systems;
- Retention of Some Information: X may retain certain information from deactivated accounts to uphold safety and security standards on the platform.
Steps to Deactivate or Delete Your X Account on Mobile
To delete your Twitter account from your phone, you’ll first need to go through the deactivation process since immediate deletion isn’t an option. Deactivation temporarily disables your account, and if you don’t log back in within 30 days, it will be permanently removed. You can stop this deletion anytime during that 30-day period simply by signing back in.
The deactivation process is the same on both Android and iPhone. Before starting, consider backing up your data if you’d like to save your Tweets and messages for future access.
Follow these steps to delete Twitter on your mobile:
Step1
Tap your profile photo > Settings and support > Settings and privacy;

Step2
Go to Your account > Deactivate your account;

Step3
Confirm by selecting Deactivate;

Step4
Enter your password, then tap Deactivate to initiate the 30-day deactivation period.

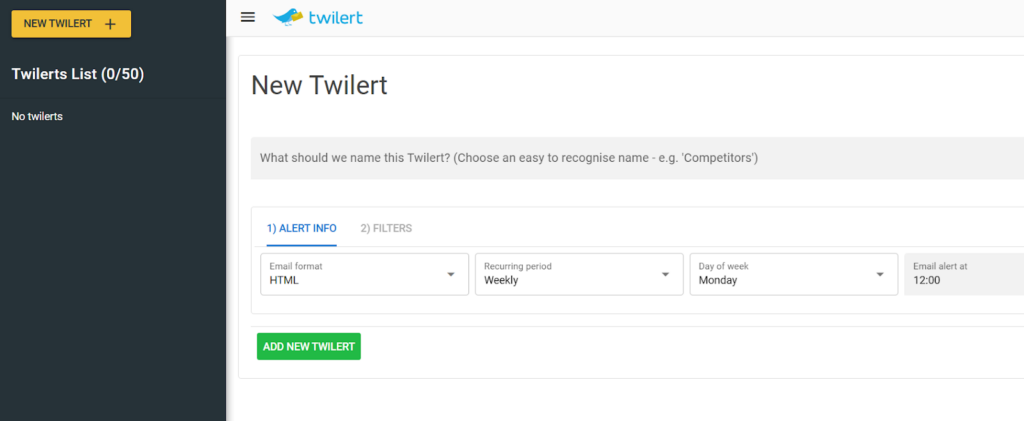
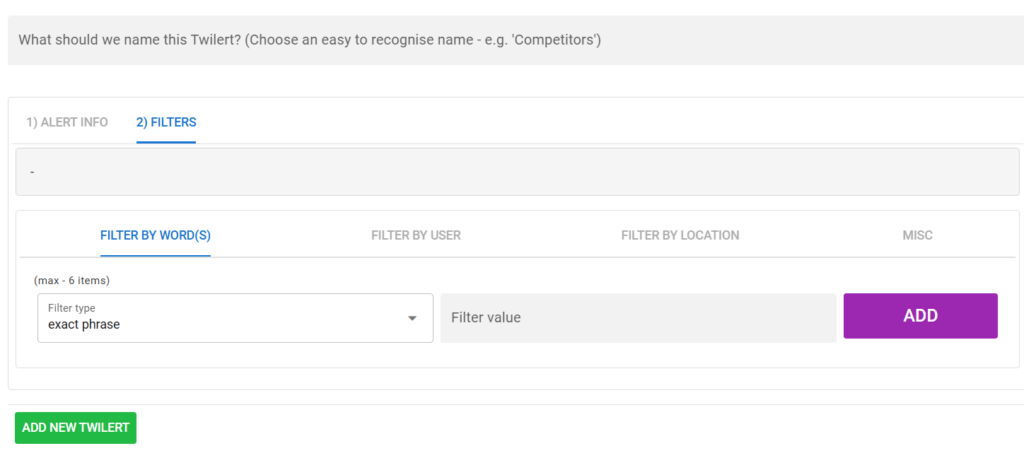
Twilert’s scheduled alerts feature enables you to monitor and record tweets mentioning your username, keywords, or other relevant terms, providing easy access to review, revisit, or delete content as needed before deactivation. This tool helps keep a comprehensive history of your X interactions.
Steps to Deactivate or Delete Your Twitter Account on PC or Mac
To delete your Twitter account from your computer, log in to X, go to your profile settings, and follow the deactivation process. After deactivation, if you don’t log back in within 30 days, it will be permanently deleted.
Here’s how to delete your X account on a Windows or Mac device:
- Sign into your account and select the More button in the main menu;
- Go to Settings and Privacy;

- Under Your Account, choose Deactivate your account;

- Review the information provided, then click Deactivate;

- Enter your password and confirm by clicking Deactivate.


What to Expect When You Deactivate or Delete Your Twitter Account
When you deactivate your X account, the deletion doesn’t occur right away. Your profile details, direct messages, and Tweets remain stored throughout the 30-day deactivation period. Once this time expires, all of your data is permanently erased, and your username will be freed up for others to claim.
If you’re interested in using the same email for a new profile, you’ll need to wait until the deactivation period is fully complete. Alternatively, you can create a profile with a different email address or reactivate your original one within those 30 days if you choose to return.
To reactivate your Twitter account:
- Open the X app on your mobile device or go to the X login page in a browser;
- Sign in using your account credentials;
- Select “Yes, reactivate” to confirm your return.

Accidentally Deleted Your X Account? Here’s How to Restore It
If you accidentally deleted your X account, no need to worry—you have 30 days to recover it. During this time, all your data, posts, and messages are saved, making it easy to reactivate.
To restore your account, log in using your usual credentials. After signing in, you’ll see an option to “Activate Account.” Click it, and your account will be fully restored, giving you access to all features and content just as before.
If you’ve deleted your Twitter account but want to make sure you can recover or manage any previous content, you can also explore how to reset your Twitter account in a few easy steps.
This recovery process provides a convenient way to regain access if you accidentally deactivated your account or reconsider your decision to delete it. Just remember to act within 30 days, as your account and data will be permanently deleted after this grace period.
Steps to Back Up Your X Data Before Deleting Your Account
Follow these steps to request a backup of your Twitter data on the mobile app:
- Tap your profile icon in the top-left corner, then go to Settings and support > Settings and privacy > Your account > Download an archive of your data;
- Enter your password;
- Tap Send code, input the received code, and then select Request archive.
To request a backup of your Twitter data on a PC or Mac:
- Click the More icon, then select Settings and Privacy> Your account > Download an archive of your data;

- Enter your password;

- Click Send code, enter the received code, and then click Request Archive.
Additional Steps to Protect Your Privacy on Social Media
Deleting your X account is a good first step, but there are other ways to protect your privacy online when using social networks. Start with these key points:
- Public Information: Remember that anything posted on social media is often publicly visible, so think carefully before sharing;
- Data Collection: Even with privacy settings enabled, platforms like Twitter may still collect and analyze user data behind the scenes;
- App Connections: Be aware of how social media apps connect with other programs, as data sharing can happen across different platforms.
To further protect your privacy on social media:
- Use a VPN: A VPN encrypts your internet connection, enhancing privacy and security when you communicate or share sensitive information online. Cybernews highlights several trusted providers that offer a VPN with free trial, letting you explore their features risk-free before committing;
- Think Before Sharing: Information shared on social media is accessible to many, so consider the potential visibility of your posts;
- Review the Privacy Policy: Familiarize yourself with the social network’s privacy policy, adjust settings as needed, and stay informed about how your data is collected and used;
- Adjust Privacy Settings: Use privacy settings within the app to manage what information is shared publicly and what stays private.

For users who need access to specific old tweets or have deleted posts they’d like to revisit, there are ways to search deleted tweets.
Final Thoughts
Removing your Twitter account is a simple way to reduce your online presence and take control of your privacy. Whether you’re looking for a short break or a permanent exit from the platform, following these guidelines will help you manage your data according to your needs. Be sure to back up any essential information before deactivating, and keep in mind that you have a 30-day window to reactivate if you change your decision. By following these steps, you can confidently manage your presence on X.

